This
instruction shows you how to subscribe to a Virtual Private Server (VPS) service
plan online (https://ionos.com in this case). With a VPS subscription, we will
have access to a remote server on a virtual machine (VM) in the data center of
the hosting company. We will choose the one-minus the current long-term support
(LTS) version of the Ubuntu Linux distribution as our operating system (OS) to learn
how to manage the Linux server VM.
Note that:
- You may need to create an account with payment information for the subscription.
- The VPS plan costs $2 per month with monthly contract.
1. Subscribing to a Virtual Private Server (VPS) Plan
- Choose the VPS Plan
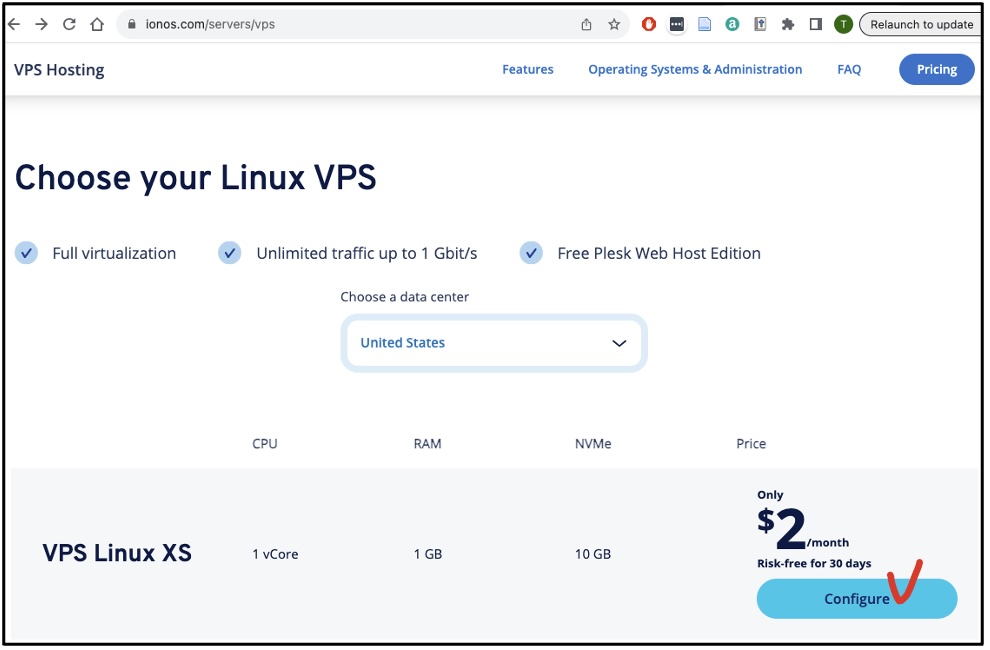
Visit the IONOS VPS webpage (
https://ionos.com/servers/vps),
scroll down to find the $2/month VPS Linux XS plan, and select it by clicking on the Configure
button.
- Choose the Operating System
Continue
by choosing Linux as the Operating System (OS) and the one-minus latest Ubuntu major
version (22.04 in this example since the latest LTS version is 24.04), and
click on Continue at the end of the page.
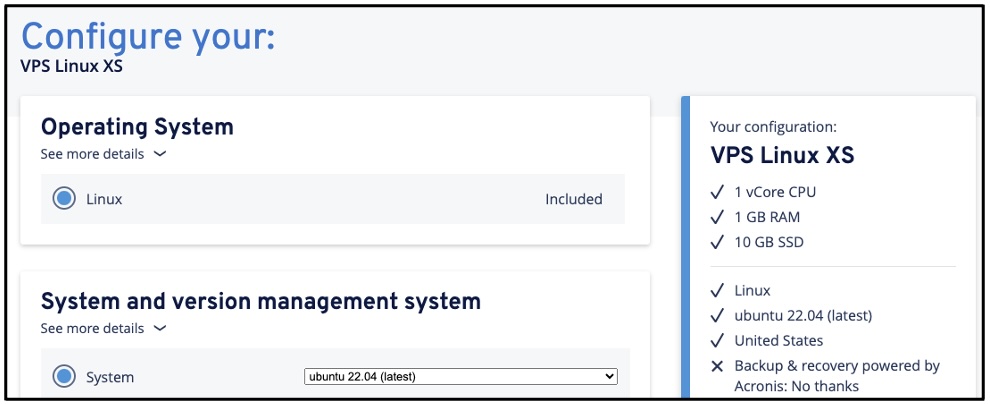
If prompted, skip the advertised services (tick “No thanks”).
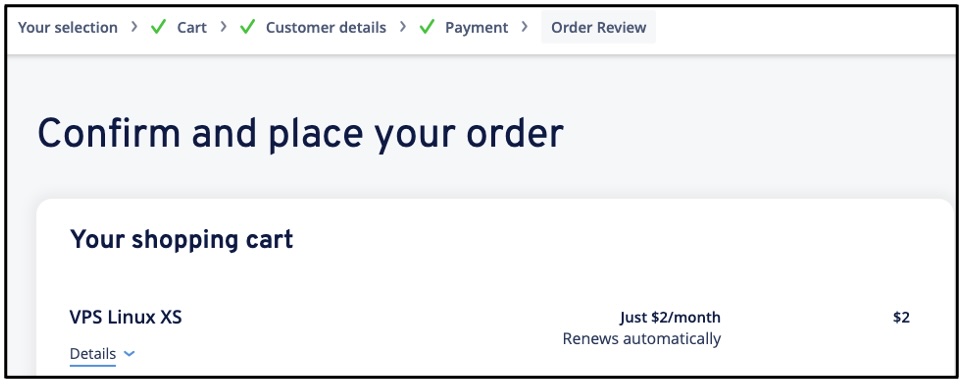
- Confirm the VPS Plan
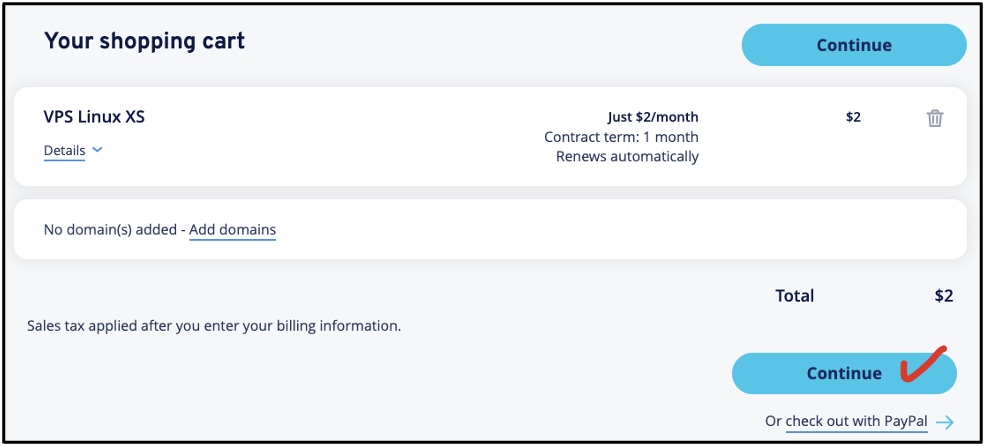
Continue with the selected VPS in the shopping cart. Make sure it says $2 in total unless you
choose other add-on product or service such as a domain name.
- Create User Account
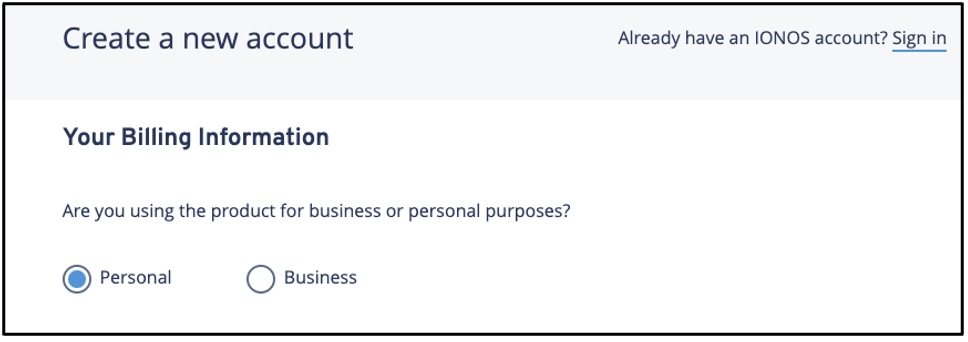
If you have not done so already, create an account with payment information
(credit card or PayPal). You will access your VM using this account information.
- Step 5/5. Complete the Order
Confirm to Order Now.
2. Obtaining VM IP Address and Root Password
This instruction shows you how to access your remote VM server information so you
can use them to access it from your local computer.
Objectives:
- Obtaining the VM IP address from the hosting company website VPS
- Obtaining the VM root user account password from the VPS
- Log in and Select Servers

- Select the Contract
Select your VPS to go to the administration page; and then select your server name (“centos” in this
example but you should see something like “Ubuntu”) to bring up the Features tab.

- Copy the Host IP Address and root User Password
From the Features tab, copy (using the Copy icon) your 1) VM Host IP (Internet
Protocol) address and 2) the Initial Password of the “root” user account. Keep
the IP and password somewhere secure and accessible (e.g., your Canvas Assignment
a00).

3. Connecting to Your Virtual Machine (VM)
This instruction shows you how to connect to your server, a virtual machine (VM)
host computer from your VPS subscription. We will use the ssh command
to connect to your VM server from your local “client” computer (laptop, desktop, or tablet).
- Open the Terminal Application
Open a terminal from your personal computer to access the VM:
- macOS: Launch the Terminal.app (Command+Space, type to choose Terminal.app and enter)
- Windows: Execute the Windows PowerShell program (Win key+R then type PowerShell and Enter)

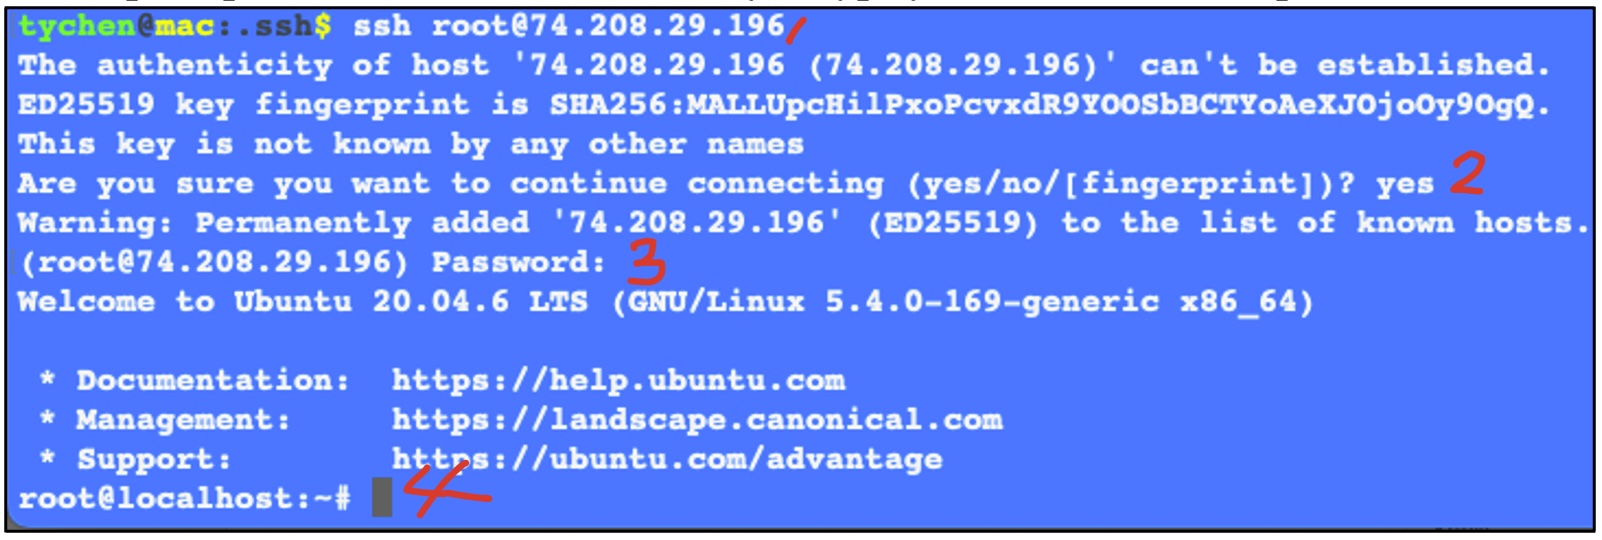
- Connect to VM Using SSH
- Type ssh root@
VM_IP_ADDRESS at the command prompt
(leave a space after the ssh command) and Enter.
- Answer “yes”
(“yes”, not “Y” or “y”) to the security prompt (“The authenticity…”) to connection to
the VM. (*Here our computer says it does not know the VM)
- Copy and paste your password when prompted and Enter
(you will not see anything when
pasting/typing the password: no news is good news).
- You are now logged in the VM as the root user and should see the command
prompt root@localhost:~$,
where you type your commands to operate the VM.
Note:
- The “root” user: We DO NOT usually use the root user account when using Unix-like
operating systems. In our case here, it is provided by the hosting company for us to start
configuring the VM.
-
Secure Shell (SSH): The SSH protocol is a network protocol that encrypts communication between
computers. Many computers have both SSH client and server applications installed by default for
us to connect to and run commands on a remote computer.
4. Configuring VM Firewall Policies
This instruction shows you how to access the network firewall policy of your Linux server in the virtual
machine (VM) so we can modify the firewall policy as needed. (Note that the intended ports should be open
already by default.)
Objective:
- Enable network ports (22 and 80) on the VM for connection and serving Web content
- Configure Network Ports
- Click on the Network button on the blue left menu of the Servers page.
- Click on the Firewall Policies option from the dropdown menu. The Firewall Policies page will show
up.
- Click on the server Name to show the firewall policies table.

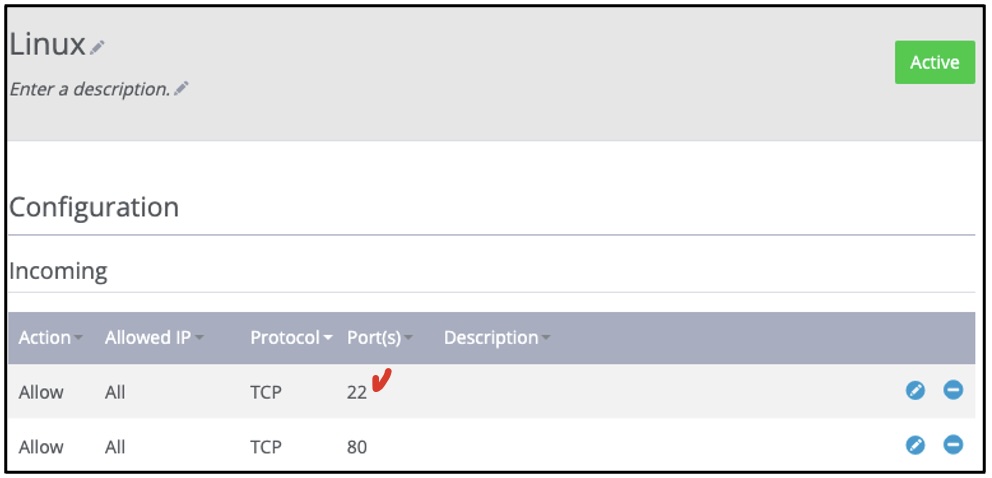
- Open the SSH Port (Port 22)
Port TCP 22 (used by the Secure Shell, or SSH, protocol) should show as below on the Configuration
=> Incoming list with values of Allow All.
If port 22 is not shown on the Allow list of the firewall policies, go to the end of the list and do
the
following:
- Click on the Add Predefined Values button below the firewall policies to bring up the protocol
popup menu.
- Click on SSH in the popup to add port 22 to the firewall rules table.
- Click on the Add Rule button to add the firewall rule to allow network connection through port
22.
*Note that it may take several seconds for the new firewall policy to take effect.

- Open the HTTP Port (Port 80)
Repeat Step 3/4 to open port 80 (used by HTTP) or other ports desired.

 If prompted, skip the advertised services (tick “No thanks”).


